
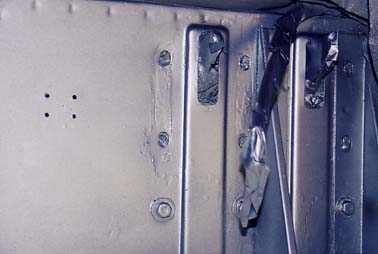
 Notice
no bleeder. Waiting to install.
Notice
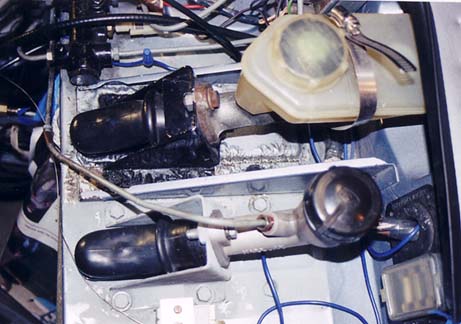
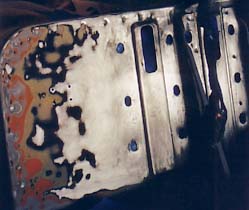
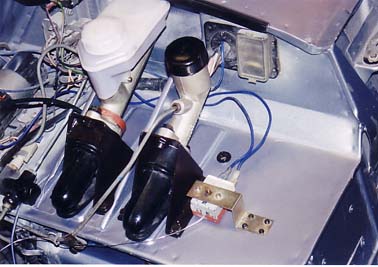
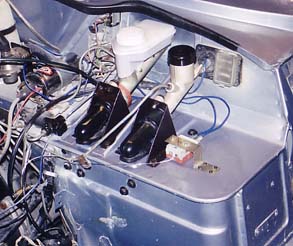
no bleeder. Waiting to install.For the past several weeks I've been upgrading my brakes with stainless hose, green stuff pads and new rear pads. I installed a brake line from my clutch slave to the engine compartment for easy bleeding, without tearing the interior out.. Works great. But ever since I bought the car I've had paint bubbles all around my clutch and Brake masters. Anyone who has converted to Silicon Brake fluid knows how good a paint remover brake fluid is. There was a Clamp wrapped around the brake master reservoir, so I knew there was a problem. Hoping it was corrected I crossed my fingers and waited until this 3rd season, to attempt a repair. I also noticed the paint on the brake pedal was bubbling as well, and the clutch pedal also showed signs of the paint remover. The fluid also had a grey color even though it was fresh. Must be rubber seals mixed in the fluid I thought.
Notice
no bleeder. Waiting to install.
No problem I though. I had bought a rebuild kit last season. I removed the clutch slave and then noticed the seals were different. It was a Australian PRB clutch master. I ordered a PBR rebuild kit. I cleaned everything and greased the seals ( I know your not suppose to do that) as I waited for new seals to arrive. I though the red grease would help it seal. I then removed the bubbled paint and primed the bear metal. No sense painting until I was sure the leak was gone. For two days no leaks. Then on the third day leaking under the clutch master. As I read the instructions for the PBR that just arrived, they said the cylinder could not be re-honed. Ok in for a nickle, I ordered a new PBR clutch master and a Brake master rebuild.
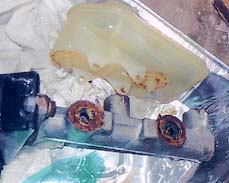
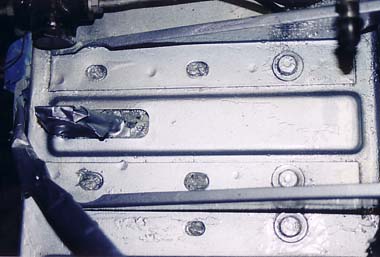
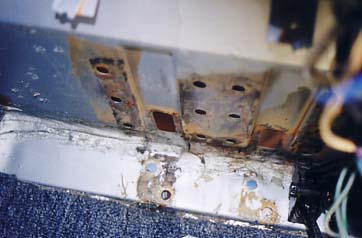
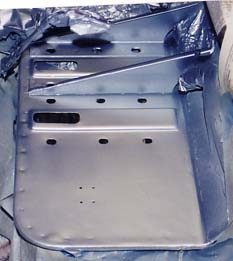
I next removed the Brake master ready to
rebuild. On the back was a sticker saying to use an oversized seal kit,
since it was rehoned. You can see from the picture the scored piston and
the bored was as well. Off the the phone to order a new master.
(expensive hobby).

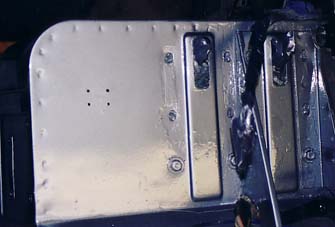
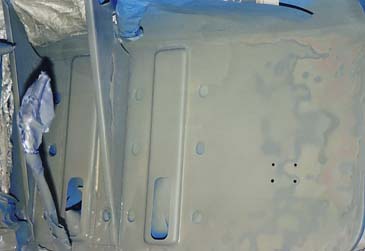
Today I had my first try at 2 pack base/clear paint with an HVLP gun. While I waited I cleaned, sanded and primed the area. Had paint mixed. ( you cannot buy Ford touch-up in a spray can anymore). My color is 97 Ford Light Demin Blue metallic. 80 bucks later ready to paint. Primed it yesterday. Base and clear applied today. The clear coat is a 2 part paint (Omni Au Mc260) with a toxic hardener. Hope my mask was good enough. I used an HVLP gun I bought from Harbor Freight. Not bad results, but I could redo it again better. It was hard to sand and level with the pedals still installed You can see the defects in the picture. If I can fair it well and keep the dirt off the next time it will look much better.
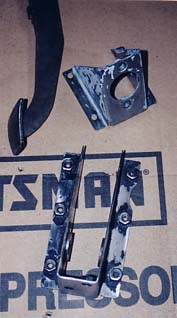
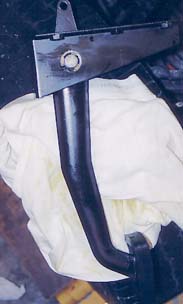
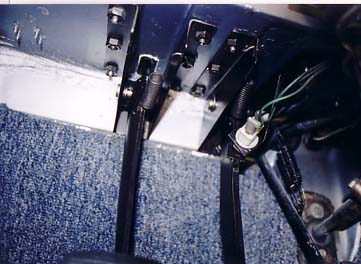
I've removed, to clean and repaint, the clutch and brake pedal assembly. I should have remove them before painting. I cleaned them up removing all the dead paint.
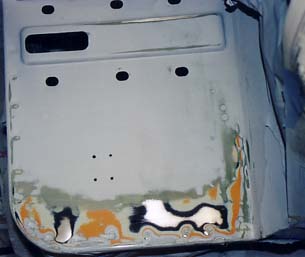
I decided to redo the paint job and switch to Silicone Brake fluid . Do not want to ever do this again. There was still some damaged paint under the new painted area. Now that I know how to fix it, I want it done right. Here are more reasons why. You can see the rough areas. The paint on the the flat panel came out ok, but the rest was not "properly sorted out".
I used a die grinder and wire wheel to take of the new paint after removing the pedals and accelerator cable (some damage on the other side of the bracket. Next I sanded with 80 Grit then 400 Grit paper. With the pedal gone it was much easier to get the down to bare metal where I could. You can see the undamaged original paint did not come off easily. I just sanded it smooth.
I used Duplicolor etching primer as the first few coats. It is supposed to bite into the bare metal. These are the first thin coats.
I'm waiting for warm weather to apply a
regular primer then sand and paint. While waiting I'm attacking the rest
of the mess.
The clutch and brake pedal were a gooey mess of bubbled paint.


After washing with brake cleaner , I used a die grinder and wire wheel to clean off most of the "paint". I tried to get down to bar metal where I could. The original untouched paint was holding well. So some areas were not taken down all the way. After the wire wheel, and Brass brush I used first 80 G sand paper then 400 grit to smooth. Before sanding I wiped the parts down with acetone to remove any grease or remnant brake fluid. Here is the after look.


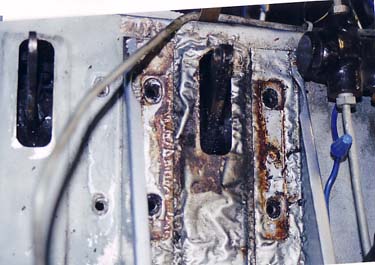
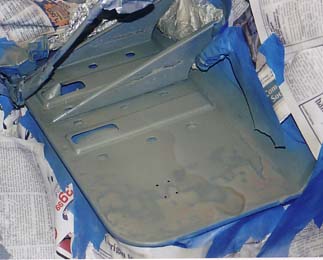
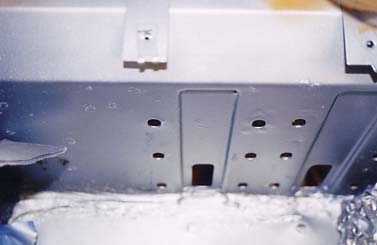
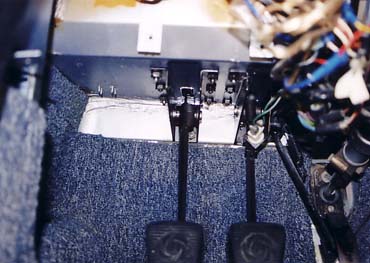
The next task was to tackle the area under the dash where the pedal brackets are attached. The area also had some minor damage. Here after an acetone wipe I scraped, wire brushed and sanded as before. Then I sprayed the etching primer in a Yogurt cup and used a brush to apply the primer. Save those yogurt cups. All the Fiberglass boat repair shops use them for mixing and applying anything in small quantities. They do not react to chemicals or paint. Here I wanted to stop any rust and then match the paint.
It might be several days for the weather to warm up enough for final painting. I have cleaned all the nuts and bolts. I'll paint the tops black sometime this week.
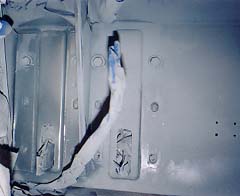
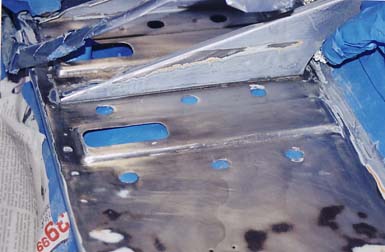
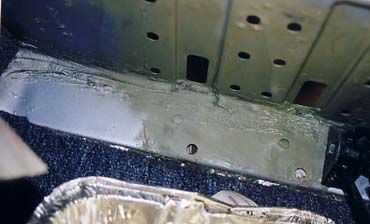
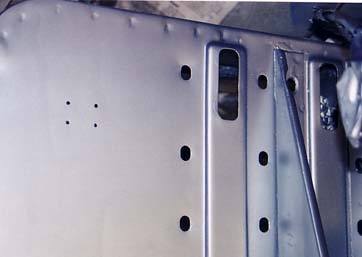
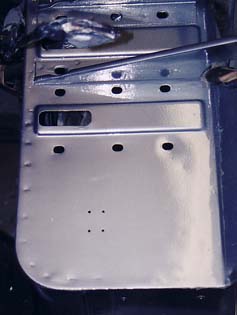
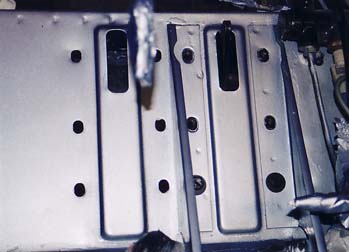
Started again. After stripping most of the paint I then used etching primer(green). Then applied regular Duplicolor grey primer. The area with paint remaining revealed scratches. I then sanded that area smooth and tried again. Used 400 then 600 Grit paper

Green spots in second picture cover bear metal exposed during sanding. After base coat was applied. 3 to 4 coats. Get the best mask you can. It's well worth it. Mine is by 3M and is approved for toxic vapors.
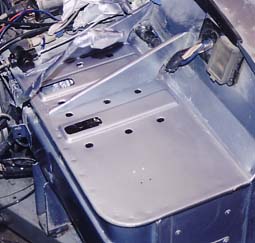
The area under the dash will definitely reveal the need for a good mask. The vapors in that enclosed area were like a dense fog. The base coat is shown below. Use aluminum foil to cover odd shaped parts. Covered the gas petal area with it. Most of these tips I pickjed up from www.autorestorer.com . Great site for auto restoration.
The Omni Clear coat uses a catalyst that is essentially super glue. Without a mask I was warned the vapors will harden in your lungs, cause kidney damage .... With the 3M mask could not even smell it. They say use 2 coats or more if you plan to sand alot. A friend in the club said he used 5 coats then sanded with 600 800 1000 1200 2000. I used only 3 coats and started with 2000 grit. I think the results might be better with the other method. Although, I think (*still in camera) the final results were great.
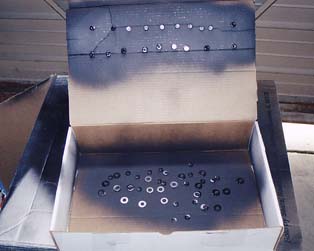
Got to have black washers and nuts. Replaced all with stainless. Never need to worry about rust after that. I used a ceramic engine paint rated for 600 degrees and is chemical resistant for all black parts. It a Semi Gloss. Hides imperfections and is more like the manufactures black for radiators etc. All the under dash components were refinished.

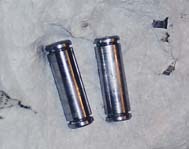
I spent extra time polishing the brass bearing with Brass polish. I then polished the stainless? pins with 2000 Grit then chrome polish. I read that it is a common wear point. I oiled both before reassembly. The rubber petals go on easier if warmed in hot soapy water. Make sure you install the return springs before installing the pedal assemblies. I didn't and wasted 45 minutes later when they needed installation.
The Final results
I bled the brakes and clutch 3 times over 4 days. Based on the articles I've read it takes that many times to get all the air bubbles out. I noticed no difference in petal feel from the first attempt. The clutch seems to engage sooner on the upstroke, otherwise I feel no difference. With the amount of fluid that spilled while installing everything, I am sure glad I switched to silicone. Now onto the next project.