

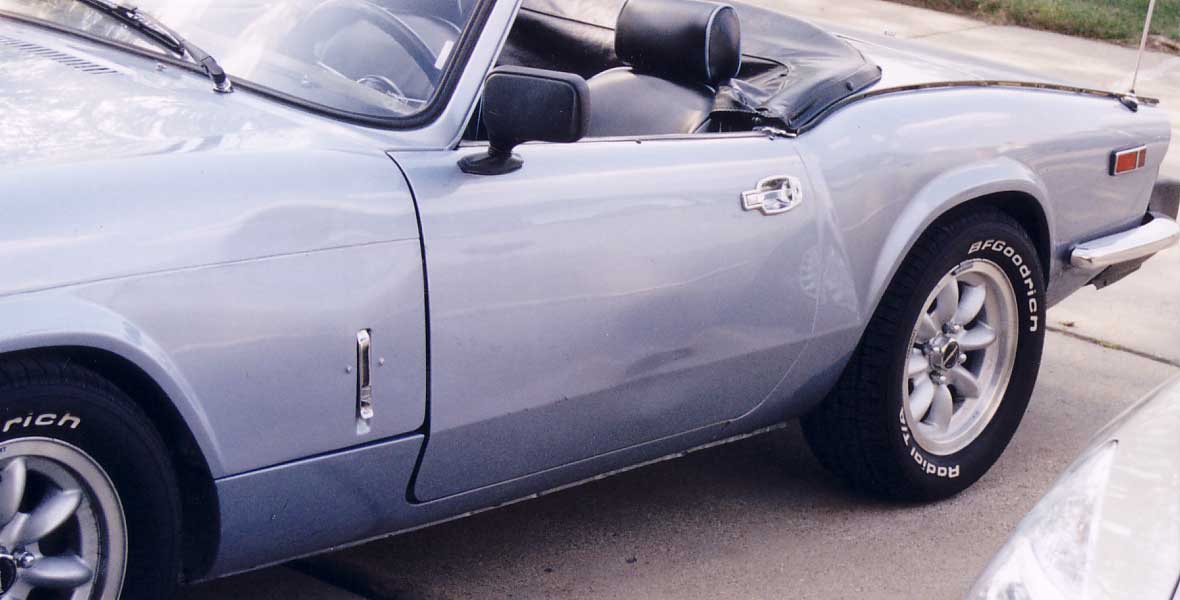
An F250 Pickup decide to take a shortcut and back out of a parking spot over my car. He needed to walk right past it from the restaurant to get to his truck, but said he didn't see it. But he was nice enough to report it at the restaurant. His tire cause the damage to the fender/hood, and door. The tire must have pushed against the wheel., there are scratches on the wheel, the center cap has broken clips ( not sure if related) and the White letter were brown in spots. I'm concerned my brand new alignment may be off as well. I need to find a great bump shop with experience on Triumphs in the Detroit area. Any recommendation.
It looks like the fender was pushed in as well. The alignment to the door is off that the hatch clamp is a little crocked.
More to come as I go for repairs. I selected T&W auto body in Waterford. The restore many British cars.


Update
I stopped by last Thursday. The dents have been bumped out and there was a fresh coat of bondo yet to be sanded. They removed all the hardware on the drivers side including the rear bumper. They intend to paint the entire side. He also welded the 2 stress cracks on in the
bonnet latch area. I stopped by to deliver new hood cones. One had broken in half and they needed them to align the hood. The craftsman working on my car though the hood bracket was bent which causes the mis-alignment pushing the hood to one side when closing. Looks like the bracket are not available new. Will need to be repaired, but not part of insurance.
On the fender/hood seam they had previously filled most of it with seam sealer. Tom said that it should not be filled, just lightly in the crack. The other side seam is also showing a bit of rust coming through. Then both sides will either need to be repaired or the driver side filled to match.
I want to get the entire hood fixed with the seams set so they will not come through again, if that is possible. Tom seem reluctant to paint the entire hood. He is concerned with matching the paint with the other door. All this is not covered by insurance. I'm still waiting on a quote.
The workman said that it would be nice to weld or better yet for me to fashion a backing plate for the hood latch to prevent the
inevitable metal fatigue from careless lifting of the latch. Sounds like a project to come. I wonder if anyone has done that.
He said about 2 weeks to finish.
I talked with the craftsman working on my car for a bit. He used to restore 56 Chevy's and sounds very concerned and
knowledgeable. He is also restoring a Porsche 911 that he showed me.
While I am waiting I painted the vinyl door panels. The first color I found was a slate blue. It came out great, but darker than the current ones. Stopped by painters supply
yesterday and found some wedgewood blue, almost the same color as the paint and seat piping. Not sure if that would be too much lite blue, but will but up pictures later. Like your option. Easy to change.
I painted the back fiber board with polyurethane to make it more waterproof. Seems to work well. I may try epoxy on the other panel.
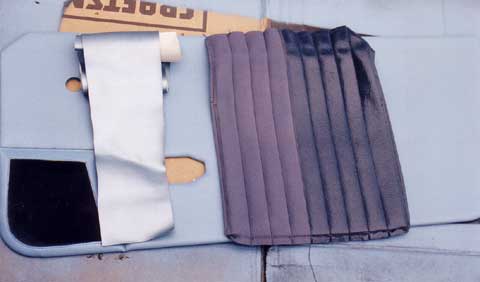
Door vinyl color. The vinyl material
in a roll is the piping color of the seats and is close to the car color.
The darker color is slate blue. The door is wedgewood blue. The top
area of the door above the panel is black vinyl. The wedgewood may not
match but the Slate may be too dark. It would be nice to have a color like
the piping, but my choices are limited. Not sure what I will end up with.
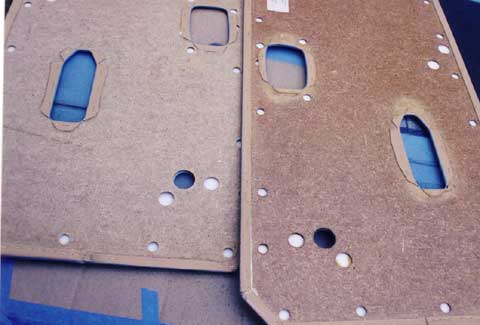
Original Door Panel


 before and after with polyurethane
Epoxy coating
 after with Epoxy. Note the harder finish.
Well the color options have been all over the board. I stripped the 2 different paint colors off with rubbing alcohol then used the SEM vinyl prep to apply the custom color matched to the seat piping. For this new paint I need to use my compressor and HLVP paint gun. After several coats the texture felt rough although it had a satin shine. I then applied 3-4 coats of SEM Satin clear coat. That both sealed it and it feels almost like vinyl again. The dark blue Duplicolor vinyl paint felt smooth and finished with just the paint alone. It also holds better. See the 2 panels. The dark blue Duplicolor paint was only applied on one panel. Then it was repainted with light blue Sem.. The rubbing alcohol removed the SEM paint but did nothing to the Dark blue. If you can find the color you like in Duplicolor use it.

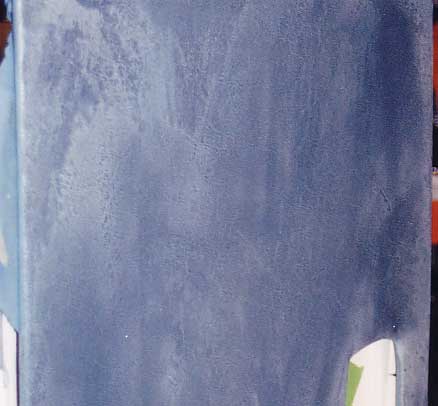
Final color. Well it looked close. Since the car was in the bump shop I had them match the seat piping. Big Mistake. Looks OK by itself but ug when installed. Note the 2 different tones between the body and Panel. A little clash. Next I will try having a custom match to the car color. Hope that helps. Back to the paint shop.


The Spit is finally back. Here is the start of the story.
Since the hood was realigned, I was looking for how to remove the overriders to try to better adjust the hood. It was rubbing when raised and the gaps were a little wide. I took the car to the local Mobil station to change the trans fluid (another story). As he push it back off the lift the overider came off. It went back on, but I could see why. The lower slot for the nut was worn at the edges. It was repaired before, as I saw epoxy or another filler used to attempt a repair. The other one was even worse. I then decided to repair the worse of the two with Epoxy and a fairing filler (used to fair hulls on boats - easy to sand) to thicken it. I sprayed the nut with silicon spray to act as a release agent. The taped a piece of clear vinyl (from display package) to the top to form the mold. Mixed to a peanut butter consistency I filled the slot with the epoxy mixture. After waiting a few minutes I then fitted the overrider back on. The nut should then create the void and hopefully an even tighter fit. It really is fairly snug now, but I see myself taking a bump and losing one. They are no longer available..
See Tape on top
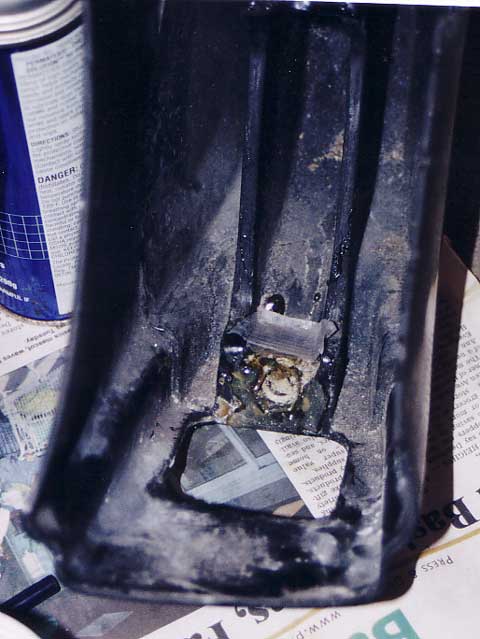


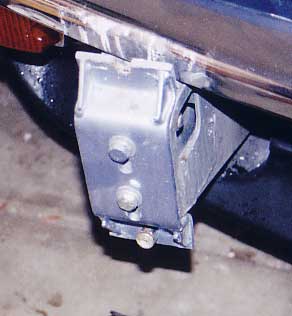
I not sure if the slot is intended to lock the nut, so that you must remove the bolt to free the overrider. The way it is now you lift from the bottom and pull forward and up and its off. The top bolt inside the overrider fits it the upper slot of the bracket. The lower slot fits in the lower nut.

The car was in the bump shop for about six weeks. Mostly waiting. I did get a chance for some pictures. As well as the damage I had a few extra things repaired. Since the fender/hood seam on the passenger side showed signs of bubbling paint (rust) coming through I thought it would be foolish not to fix it. Also many spits have stress cracks along the headlight seam. Paid to have that fixed as well. The hood latches also develop stress cracks from using them to lift the hood versus the fender well. The cracks were welded then bondoed. The seams were cleaned out and only a small amount of seam sealer was used to prevent paint from chipping. To prevent some of the flexing and lifting mistakes I just installed gas struts to lift the hood. Story to follow.


PS my other toy is in the background. They sailboat ( 76 Ericson 27) with the yellow sail cover. Mary is getting it ready for a sail as I take the picture.


There are some areas that you can see the prep on. The paint does not match exactly which can be expected (will check with Hargarty). I had to prime and paint some missed areas on the inside of the bonnet, but the paint job looks good.