
April 2003 - I noticed when I last washed the car there was a black grease around the wheel hub and lug nuts. Today I took a long drive and noticed more grease some splashed around the wheel. Appears to be from the hub.
It was Good Friday, we worked only half a day, so I decided to take a look at what it could be. After all, I bought it with the idea of learning by fixing it myself. Here's what I found.
The key and Keyway of the axle were chewed up. The Wheel must have been spinning free of the Axle causing the key to chew up the shaft. The Flange was scored as well. You can see the pieces of metal that fell out as I cleaned it.
Note the hardest part of this job is supposed to be removing the flange pictured below. Too much pressure and you can bend the ears with the puller. Mine just came off. When the replacement flange came in (used) the mechanic I showed both too noted how thin the slot on my original was.


With the help of my friends on the TTN Network. Here is a tread history to date
Removing the entire Axle with Vertical Link attached was fairly straight forward by following the manual. The hardest part was trying the remove the axle bolts at the ujoint flange to the differential. Since I worked by myself I had to hold both wrenches and loosen the nut while holding bolt from turning.. Not challenging normally, but the location was awkward for me. It was best to work from the wheel well for me. Then I went to the local hardware store and sourced new nylocks for all the areas. The Bearing kit will have the main shaft nut in it.
Then I started removing the Brake assembly and all its parts

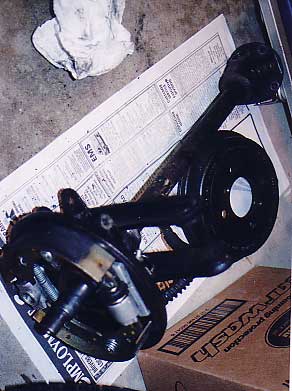
Everything appeared freshly painted and all parts looked almost new.


More before pictures you can see how recent the restoration was


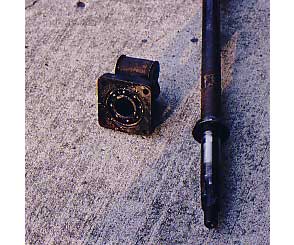
Now the adventure started. How do I remove the Trunnion Housing from the shaft. Basically at this point, I went shopping for tools. Bearing and Gear pullers were high on the list. Also had order a new shaft, used Flange and Bearing kits and bushing for the suspension areas.
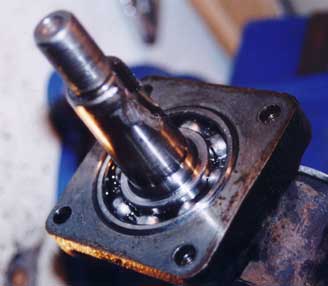
The instructions called for removing this main bearing then the unit could be pressed off the shaft. A special tool is referenced. Yea.
Needless to say the standard bearing pullers do not work on inside bearings with
no access behind them. I took it to my local Tuffy place that helped me with my
exhaust and the said they could do it. Steve ordered new tools but none
would work. So they took heat and voodoo to get it off. (see below) Then I
thought I was home free. But no. I could press one of the ujoint spiders to one
side but could not budge the cap off. Later I learn that you put the cap
in a vice and lever that shaft back and forth. But I didn't know that so
back to Steve. He tried once then got his torch and cut one of the spiders
of the ujoint off.

Next came hammering out the big bearing. This is called "drifting" it out. Take a drift (flat punch, wrench or other sturdy tool, I used a Craftsman Socket wrench - handle as drift end) to force out big bearing from the inside.
Next used socket with a bearing puller to press out the small bearing and oil seal.

It looks in pretty good shape after all that. The trunnion bushings below the shaft house have a gap between them. From the inside I drifted at the gap the first bushing out the other came out even easier. Wow. know its all down hill, I thought.
 The infamous rear Trunnion. Note cap almost off.
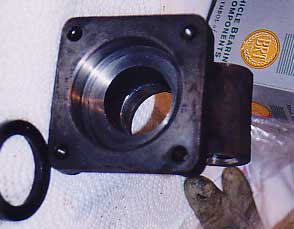
The next step clean, smooth and paint the parts as if my life depended on it. Kinda true. I used 1200D Exhaust paint on all parts. The wheel well did not need new undercoating, but in for a nickel. I used 3M premium undercoating.


