After seeing a friend in our clubs Spitfire with gas hood struts. I thought it would be a great improvement over the hood twisting, stress crack creating and heavy lifting exercise it currently is. My hope is my stress cracks never return. Even if, raising the hood is a joy and you gain better access to the engine area. Highly recommended.
Here are my notes on why after my bump and paint experience.
As well as the damage I had a few extra things repaired. Since the fender/hood seam on the passenger side showed signs of bubbling paint (rust) coming through I thought it would be foolish not to fix it. Also many spits have stress cracks along the headlight seam. Paid to have that fixed as well. The hood latches also develop stress cracks from using them to lift the hood versus the fender well. The cracks were welded then bondoed. The seams were cleaned out and only a small amount of seam sealer was used to prevent paint from chipping. To prevent some of the flexing and lifting mistakes I just installed gas struts to lift the hood.
Both Geof and I used the information on Teglerizer's great web site. http://www.teglerizer.com/triumphstuff/gasstruts/index.html.
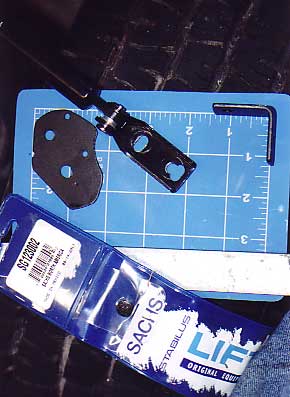
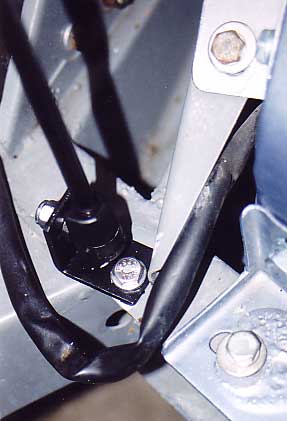
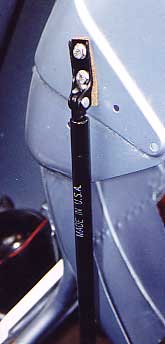
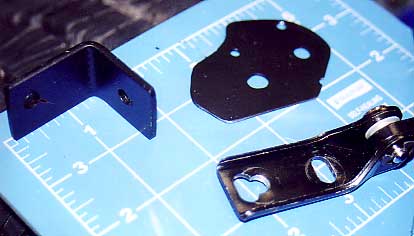
The struts are from Sachs SG123002. The only tricky part is drilling a hole in the frame for the lower bracket. It must allow room under for a nut and wrench to fit. Measure ten times using a nut - drill once. Still cannot fit entire socket must use open ended wrench due to wanting the end of bracket to be somewhat braced by the side rail. See pictures. I made the brackets from some zinc stock I bought. The bottom is is longer 1 3/8 versus 1 1/8 on the vertical side. This gives the frame nut and lower strut clearance. The backing plate is a framing truss cut in half. It is thin enough to bend to fit as tighten and 2 holes of the many holes can be lined up to just enlarge. The bottom need a little widening (see 3rd picture). I measured and made each custom due to both positions on the fender being slightly different. I was not surprised I also did not make the hood go up to its stop but just a little before stop. This is a trial and error step you should take time with. Mark the top hole of the bracket position on the well and drill the first hole. Then bolt in temporarily and drill the bottom hole. Attach and fit the first strut before removing the standard hood bars and do the drivers side next.
I added a gasket backing to the upper bracket to avoid scratching the paint and giving a soft backing. Note the positions of the bracket holes. You want to be able to remove the lower strut without removing and bolts. Put a screwdriver between the clip and the rod and the pin can be pulled free.